
Migrating a website to WordPress can feel like moving to a new city: exciting but daunting, with the risk of leaving important things behind or losing your way. Whether you’re transitioning from another content management system (CMS) like Joomla, Drupal, or a static HTML site, or even upgrading from an outdated platform, the goal is to ensure a seamless move without losing your valuable data or hard-earned SEO rankings.
In this comprehensive guide, I will walk you through the step-by-step process of migrating your website to WordPress while preserving your content, functionality, and search engine performance. With examples and practical tips, you’ll be equipped to make the transition as smooth as possible.
Why you should migrate your site to WordPress
Before diving into the how-to, let’s address why WordPress is often the go-to choice for website owners. WordPress powers over 40% of the web as of 2025, from small blogs to enterprise-level sites like The New York Times and Forbes.
Its flexibility, vast plugin ecosystem, and SEO-friendly features make it ideal for businesses, bloggers, and e-commerce stores. For example, when TechCrunch revamped its site in 2013, it chose WordPress for its scalability and ability to handle high traffic while maintaining SEO performance. Similarly, small businesses like The Rusty Pelican, a Miami-based restaurant, migrated to WordPress to streamline content updates and improve mobile responsiveness, boosting local search rankings.
However, migration comes with risks: broken links, lost content, or a dip in SEO rankings can derail your efforts if not handled carefully. This guide ensures you avoid these pitfalls.
Step 1: Plan Your Migration Thoroughly
A successful migration starts with a solid plan. Without one, you risk missing critical elements like pages, metadata, or redirects that could harm user experience or SEO.
How to Audit Your Current Website
Begin by cataloging all assets on your existing site:
- Pages and Posts: List all URLs, including blog posts, landing pages, and static pages.
- Media Files: Images, videos, PDFs, etc.
- Metadata: Titles, descriptions, alt tags, and keywords.
- Internal and External Links: Track links to ensure they’re redirected correctly.
- Functionality: Forms, e-commerce features, or custom scripts.
When Smashing Magazine migrated to WordPress in 2017, they created a detailed spreadsheet of all URLs, categorized by content type (articles, tutorials, etc.), and noted which pages had high traffic or backlinks using tools like Google Analytics and Ahrefs. This audit helped them prioritize redirects for high-value pages.
Therefore, when migrating, use tools like Screaming Frog SEO Spider to crawl your site and export a list of URLs, status codes, and metadata. This provides a clear roadmap for migration.
Choose a Hosting Provider
WordPress requires reliable hosting to perform optimally. Choose a provider with strong uptime, speed, and WordPress-specific features like one-click installs or managed hosting. Popular options include WP Engine, SiteGround, or Bluehost.
Set Up a Staging Environment
Never migrate directly on a live site. Set up a staging environment. This is a duplicate of your WordPress site where you can test the migration without affecting the live version.
Tip: Most hosting providers offer staging environments. For example, WP Engine provides a one-click staging setup. Alternatively, use a local development tool like Local by Flywheel to create a test site.
Step 2: Back Up Everything
Data loss is a migration nightmare. Before touching your site, back up all files, databases, and configurations. Learn the Best practices to safely backup your website
Back Up Your Current Site
What to back-up from your site
- Files: Download all files via FTP (using tools like FileZilla) or your hosting control panel.
- Database: Export your database using phpMyAdmin or a similar tool.
- Settings: Note any custom configurations, such as .htaccess rules or CMS-specific settings.
In 2019, an e-commerce store, Eco-Friendly Goods, lost product descriptions during a Joomla-to-WordPress migration because they skipped a full database backup. They had to manually recreate content, costing weeks of work. A simple backup could have prevented this.
Tip: Use plugins like UpdraftPlus or Duplicator for WordPress backups, and store copies in multiple locations (e.g., Google Drive, Dropbox, and an external hard drive).
Verify Backup Integrity
Test your backups to ensure they’re complete and restorable. For example, restore the database on a test server to confirm all data is intact.
Step 3: Set Up Your WordPress Site
With your plan and backups ready, it’s time to set up your new WordPress site.
Install WordPress
Most hosting providers offer one-click WordPress installation. If not, download the latest version from WordPress.org and follow their installation guide.
Choose a Theme
Select a theme that matches your current site’s design and functionality. For example, if migrating an e-commerce site, themes like Astra or OceanWP integrate well with WooCommerce. For instance, The White House website, which runs on WordPress, uses a custom theme optimized for accessibility and responsiveness. When migrating, they ensured the new theme replicated the old site’s layout to maintain user familiarity.
Install Essential Plugins
Plugins extend WordPress functionality. Install these to support migration and SEO:
- Yoast SEO or Rank Math: For managing metadata and redirects.
- WP All Import: For importing content from other CMSs.
- W3 Total Cache or WP Rocket: For performance optimization.
- Contact Form 7 or WPForms: For recreating forms.
Step 4: Migrate Your Content
This is the heart of the migration process. Depending on your current platform, the approach varies.
Migrating from Another CMS
If you’re moving from Joomla, Drupal, or another CMS, use a migration plugin or service:
- FG Drupal to WordPress or Joomla to WordPress Migrator plugins can automate content transfer.
- Manual Import: Export content as XML or CSV from your old CMS, then use WP All Import to map fields (e.g., titles, categories, tags) to WordPress.
Migrating from a Static HTML Site
For static sites, you’ll need to convert HTML pages to WordPress posts or pages:
- Manual Copy-Paste: Suitable for small sites. Copy content into WordPress’ block editor.
- HTML to WordPress Plugins: Tools like HTML Import 2 can automate this process.
- Custom Development: For complex sites, hire a developer to scrape HTML and convert it programmatically.
Preserve Media Files
Upload images and other media to WordPress’ Media Library. Ensure file names and paths remain consistent to avoid broken links.
Tip: Use the “Auto Upload Images” plugin to automatically import images referenced in your content.
Step 5: Replicate Functionality
Your old site likely had forms, e-commerce features, or custom scripts. Replicate these in WordPress.
Forms
Recreate forms using plugins like WPForms or Gravity Forms. Export form data from your old site (if possible) and import it into WordPress.
E-Commerce
For e-commerce sites, WooCommerce is the go-to plugin. Import products, categories, and customer data using WooCommerce’s built-in importer or WP All Import. In 2021, Bookshop.org migrated from Magento to WordPress with WooCommerce. They used a custom script to map product SKUs and inventory data, preserving their catalog of over 10,000 books.
Step 6: Preserve SEO
SEO is critical to maintaining traffic. A poorly executed migration can tank your rankings. To solve this challenge, do the following:
Set Up Redirects
Redirect old URLs to their new WordPress equivalents to avoid 404 errors:
- 301 Redirects: Use Yoast SEO or a plugin like Redirection to set up redirects.
- Maintain URL Structure: If possible, keep your WordPress permalinks identical to the old site’s structure (e.g., /blog/post-title).
When Mashable migrated to WordPress in 2016, they implemented 301 redirects for thousands of URLs, ensuring backlinks from high-authority sites like The New York Times continued to drive traffic.
Preserve Metadata
Transfer title tags, meta descriptions, and alt text. Plugins like Yoast SEO allow bulk editing of metadata.
Submit an Updated Sitemap
Generate a new XML sitemap using Yoast or Rank Math and submit it to Google Search Console to help search engines index your new site.
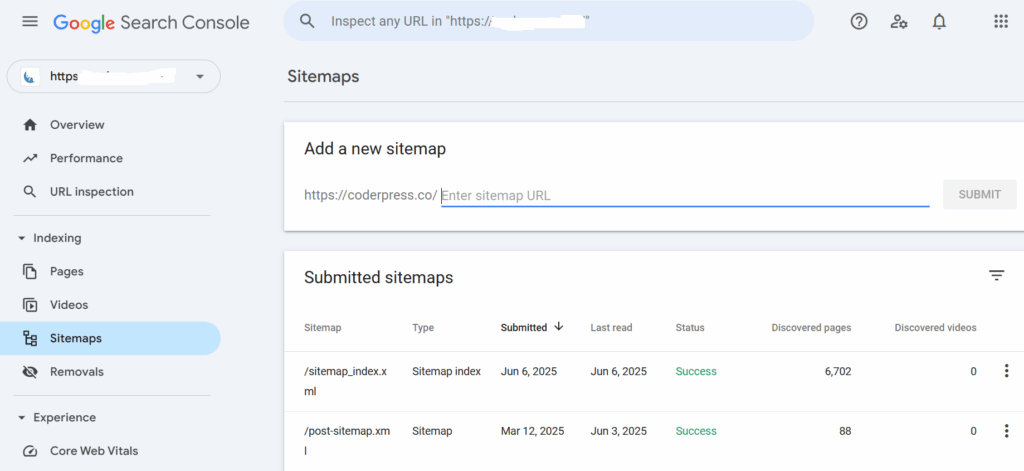
Tip: Use Google Search Console’s URL Inspection tool to check if redirected URLs are correctly indexed.
Step 7: Test Everything
Before going live, rigorously test your WordPress site in the staging environment:
- Check Links: Use Broken Link Checker to identify broken internal or external links.
- Test Functionality: Verify forms, e-commerce checkouts, and other features work.
- Mobile Responsiveness: Test on multiple devices using tools like Google’s Mobile-Friendly Test.
- Performance: Use GTmetrix or PageSpeed Insights to ensure fast load times
Step 8: Go Live and Monitor
Once you’re confident in the staging site, push it live:
- Update DNS Settings: Point your domain to the new WordPress hosting server.
- Monitor Performance: Use Google Analytics and Search Console to track traffic, rankings, and errors post-migration.
- Fix Issues Promptly: Address any 404s or performance issues immediately.
Step 9: Optimize Post-Migration
After going live, optimize your site to maximize performance:
- Improve Speed: Enable caching with WP Rocket and optimize images with Smush.
- Enhance Security: Install Wordfence or iThemes Security to protect your site.
- Update Content: Refresh outdated pages to boost engagement and SEO.
Common Challenges during Site Migration that you should Avoid
- Skipping Backups: Always have multiple backups to avoid data loss.
- Ignoring Redirects: Broken links harm user experience and SEO.
- Neglecting Testing: Launching without thorough testing can lead to errors.
- Overlooking Mobile Optimization: Ensure your theme is responsive, as mobile traffic accounts for over 50% of web visits in 2025.
Conclusion
Migrating to WordPress doesn’t have to be a stressful ordeal. By planning meticulously, backing up your data, preserving SEO, and testing thoroughly, you can ensure a smooth transition. Real-world examples like TechCrunch, The Guardian, and Bookshop.org show that with the right approach, migration can enhance functionality, improve user experience, and even boost SEO performance.
Follow the steps outlined above, leverage the right tools, and don’t hesitate to consult a professional for complex migrations. Your WordPress site is not just a new home for your content, it’s an opportunity to elevate your online presence.
Leave a Reply